How to Make Watercolor Paints from Natural Dye Pigments
Making Homemade Watercolor Pigments with Natural Dyes
I have included some Amazon Affiliate links below. As an Amazon Associate, I earn from qualifying purchases.
This year, I started experimenting with making my own watercolors using plants and natural dyes from my homestead. I’ve been dyeing yarn and fabric for a long time, and I always hate dumping out exhaust baths. Even after trying to fully exhaust the dye, there always seemed to be a bit of color left in the water. Throwing it out felt wasteful. Then I came across this Botanical Colors blog post on extracting and drying pigment from dye exhaust baths and realized I could turn those exhausts into natural pigments for paint. That discovery opened a whole new path for me—suddenly the waste from my fiber dye pots could become the source of my own watercolor paints.
I’ve made pigment with indigo, cochineal with iron, acorns with iron, coreopsis, and weld. Each plant material created a different color, sometimes earthy and muted, sometimes surprisingly bright. The whole process feels like an old-world traditional process, something painters have done for centuries using earth pigments, botanical dyes, and even precious stones like lapis lazuli. It’s slow work, yes, but an excellent way to have complete control over your art supplies, from the garden soil to the watercolor paper.

Step One: Creating Natural Pigments
The first step is extracting pigment from dye exhausts. Dye baths usually contain some excess color, even after fabric has soaked in them. By precipitating that color with a mordant (like alum, lime, or iron), the dissolved dye particles bind to a mineral base and form a solid plant pigment. Once the pigment settles, it can be filtered, rinsed with distilled water, and dried.
That’s a simplified explanation—if you want the in-depth chemistry and step-by-step instructions, I highly recommend reading the Botanical Colors post on pigment extraction. That’s the resource that gave me the confidence to try it myself.
The drying process can take a long time—days, sometimes weeks—especially if you’re waiting for thick pigment cakes to dry all the way through. When they’re ready, you can crush the cakes into smaller pieces, then grind them into pigment powders. I like to store mine in little recycled glass jars, but you can use any airtight container to protect them from moisture.
Pigments I Made
- Indigo – Always a favorite, producing rich blues. Indigo pigments are beautiful! Remember to wear a face mask when working with any finely powdered material, including natural dyes.
- Cochineal + Iron – Cochineal alone produces vivid reds and pinks, but adding iron turns it into moody purples.
- Acorns + Iron – Tannins in acorns react beautifully with iron, making strong dark browns, almost like ink.
- Coreopsis – This cheerful flower makes yellows, oranges, and rusts, depending on modifiers.
- Weld – Another classic yellow dye plant, weld produces clean, bright yellows.

Turning Dry Pigment into Handmade Watercolors
Once you have dry pigment, the next stage is transforming it into paint. Making handmade watercolor paint isn’t difficult, but it does take patience and attention. Here’s the watercolor recipe I’ve been using:
1. Make a Binder Solution or Watercolor Medium

The most important ingredients for watercolor binder are gum arabic, honey, glycerine, and a natural preservative. I make mine like this:
Ingredients:
6 Tablespoons warm water
3 Tablespoons gum arabic powder
1 Tablespoon honey
1 Tablespoon glycerine
1 drop clove oil
- Dissolve gum arabic powder in warm water. This forms a solution of gum arabic, the base water-soluble binder.
- Add a tablespoon of runny honey (this keeps the paint moist and improves re-wettability).
- Mix in a tablespoon of glycerine (this does more or less the same thing as the honey)
- For preservation, I use a drop of clove oil. Not only does it have antibacterial properties and acts as an antifungal agent, but it also smells amazing while you’re working.
This watercolor medium is one of the most important ingredients in making paint. Without it, your pure pigments are just dust.
2. Prepare the Pigment
Take a little pile of your pigment powders and grind them finer using a mortar and pestle (wear a dust mask!) The goal is to reduce the pigment to the finest particles, so it disperses smoothly in the binder.

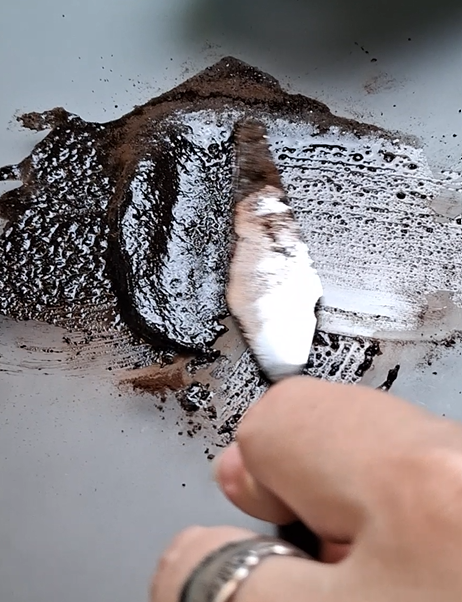
3. Mull the Paint
This is where the mulling process happens. I recommend purchasing this paint muller kit if you don’t have one. It’s the exact one I use in my video below.
- Place about one tablespoon of pigment on a glass palette or grinding slab.
- Add about 5 ml of your binder solution.
- Use a palette knife to combine them into a paste. Add more binder if it seems too dry. At this stage, it may look clumpy or uneven.
- Switch to your glass muller. Using a circular motion, grind the pigment paste against the surface until it becomes silky smooth. The grinding breaks apart clumps and disperses the pigment particles evenly throughout the binder.
If the paint feels too runny, add more pigment. If it’s too thick, add more binder. It’s a balancing act. The whole process can take a while, but the reward is a high-quality paint that you truly made yourself.

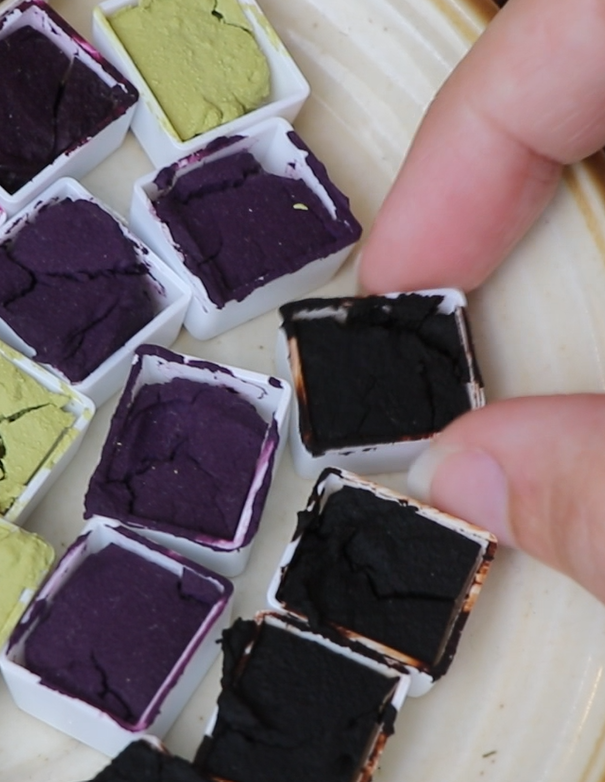
4. Pan the Paint
When the paste is ready, scrape it with your palette knives into watercolor pans (or small seashells, or bottle caps.) Smooth it out and let it dry in a clean, dust-free space. Drying can take a long time, especially with honey in the mix. Sometimes paints form drying pan cracks. You can try using more binder solution next time to fix that. If the paint doesn’t seem to dry, use less binder next time.

Tips and Notes
- Respiratory protection: Always wear a mask when handling dry pigment. Some natural pigments are harmless plant matter, but others (including heavy metals in historical pigments) can be dangerous. Even with safe plant material, you don’t want fine powders in your lungs.
- Preservatives: Natural paints can mold. Using clove oil or other essential oils with antibacterial properties really helps.
- Experimentation: Try adding mica powders or mineral pigments to your plant-based paints for shimmer and variety.
- Other binders: While gum arabic is the standard for watercolor, you can experiment with egg yolk for egg tempera, or linseed oil for oil paints. I haven’t researched these yet, so you’re on your own here!
Why Make Your Own Watercolors?
The best thing about making my own watercolors is that there’s a deep satisfaction in connecting the dots between the plants in my garden and the art I create. The same coreopsis that grew in my garden and dyed my handspun yarn yellow is now part of a watercolor painting drying on my desk. The acorns gathered under oak trees near my home are not just food for squirrels, but also part of my own paints.
It’s not the fastest or easiest path, but it’s an excellent way to slow down and meditate while also creating something useful. And instead of buying more art supplies, I can create my own.
The Joy of Handmade Watercolors
I’ll be honest: the whole process can feel slow. Waiting for pigments to dry, grinding them into powders, carefully mixing on the glass palette with a glass muller—none of it is instant. But maybe that’s what makes it so special.
Each pan of paint is unique. Some are smooth and easy to lift with a brush, others granulate beautifully on the page. Some even surprise me by shifting shades once mixed with water.
For me, that unpredictability is part of the joy. Unlike mass-produced paints, where every tube behaves the same, handmade watercolors carry evidence of their raw materials. They are living colors.
Final Thoughts
Making own watercolor paints at home takes effort, but the rewards are immense. With a handful of simple natural ingredients, a glass muller, and patience, you can turn natural dye plants into handmade watercolors worthy of any sketchbook.
The whole process—from extracting pigments out of plant material, to carefully mulling them into paint, to laying them down on watercolor paper—has deepened my respect for artists of the past who worked with what was around them.
If you’re curious about trying it yourself, start by reading the Botanical Colors post on pigment extraction. Then gather some supplies, get yourself a paint mulling kit, and begin. You don’t need to spend a fortune on art supplies to make beautiful things. Sometimes, the colors are already waiting for you in your garden, your kitchen, or your local woods.